Connect Azure
Admin consent for the CostGlass application, Reader and Cost Management Reader roles, management group or subscription scope, and a Terraform version.
Connect Azure
Approve the CostGlass application once in your Microsoft Entra directory, then give it two read-only roles on the subscriptions you want covered.
- No secret is created or pasted. You approve CostGlass's own application ("admin consent"), then assign it roles.
- The roles are Reader and Cost Management Reader. Both are read-only.
- Assign them on a management group to cover every subscription underneath, or on one subscription.
- Three equivalent ways to assign roles: the Portal, an ARM template, or a script. A Terraform version is on this page.
- If your policy forbids third-party applications, use "bring your own service principal" (one subscription only).
- A Microsoft Entra administrator (Global Administrator, Application Administrator or Cloud Application Administrator) for step 1. It is a one-time step.
- Someone with Owner or User Access Administrator on the subscription or management group, for step 2. This can be a different person.
- Your tenant allows users to sign in to third-party multi-tenant applications.
The recommended flow
Cloud Accounts → Azure. One button starts the consent.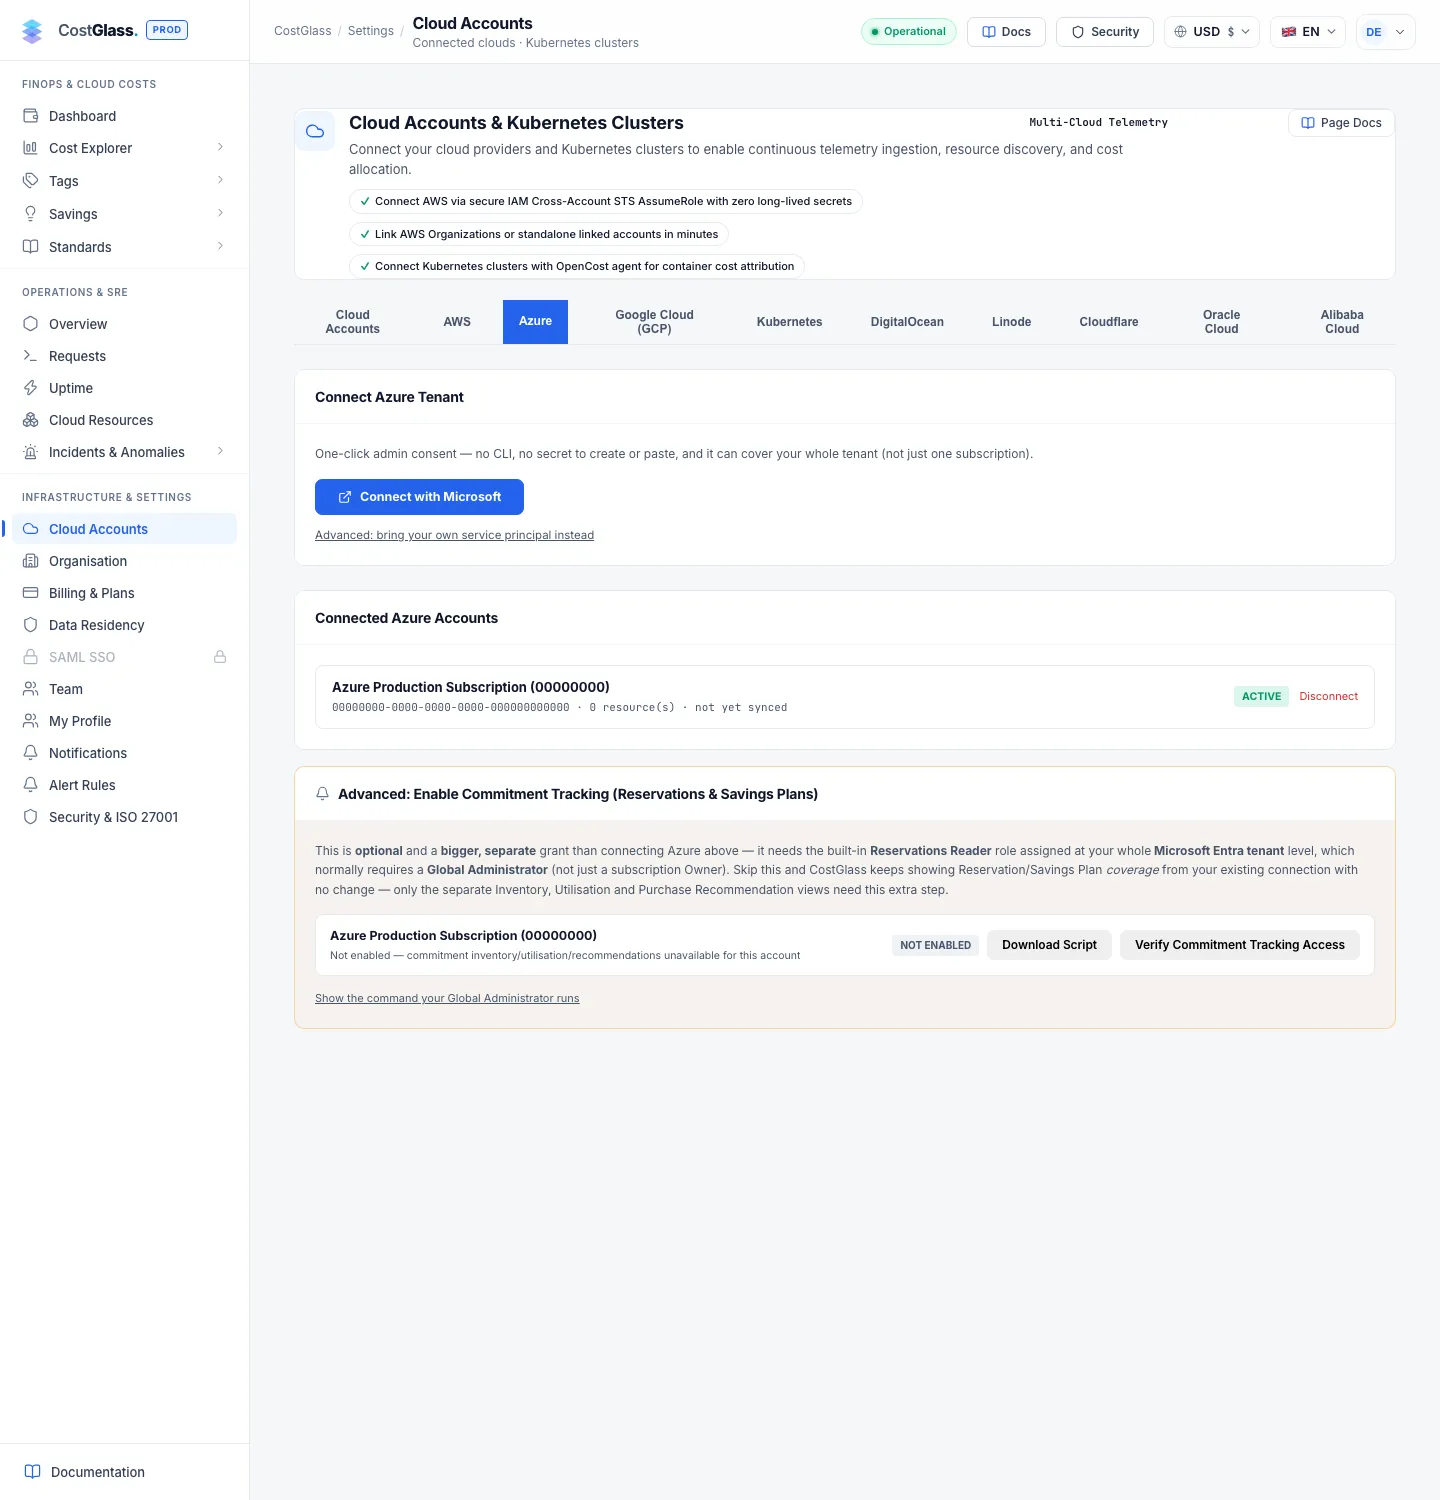
The wizard has three steps: Connect Tenant, Grant Access, Verify & Finish.
Subscription or management group?
After verify, CostGlass looks for a management group it can read. If it finds one it queries cost and resources at that scope in a single call; otherwise it loops over the subscriptions it can see.
The three ways to assign the roles
Manual (Portal), the default
ARM template (one subscription)
On the ARM Template tab click Download Template (costglass-role-assignment.json), then Open Custom Deployment. In the Portal choose Build your own template in the editor → Load file, pick the subscription, and for costglassPrincipalId paste the Object ID of the CostGlass enterprise application (Microsoft Entra ID → Enterprise applications → CostGlass → Object ID). The template cannot target a management group; use the Portal method for that.
Script (Azure CLI)
On the Script tab copy the one-line command, which looks like curl -sSL ".../v1/azure/scripts/assign-roles.sh" | bash -s -- --app-id <CostGlass app ID>. You must be signed in with az login in the consented tenant. It uses your current subscription; add --subscription <id> or --management-group <id> to choose. You can download the script first and read it.
| Role | Access | Used for |
|---|---|---|
| Reader | Read-only | Listing subscriptions and resources (inventory). |
| Cost Management Reader | Read-only | Reading cost data. |
| CostGlass VM Scheduler (optional) | Write | Start and deallocate virtual machines, read and write scale set capacity. Nothing else. Created only if you tick the Instance Scheduler checkbox. |
| Billing profile reader (billing profile scope) | Read-only | Credits, reservations, savings plans, their utilisation and purchase recommendations. This is the one billing role CostGlass asks for, and commitment tracking needs nothing beyond it. |
Terraform equivalent for the role assignments
Consent in step 1 cannot be done with Terraform: it is the one click that needs a directory administrator. After it, the CostGlass enterprise application exists in your tenant and you can manage its roles as code. Find its Object ID under Microsoft Entra ID → Enterprise applications → CostGlass, or with az ad sp show --id <CostGlass app ID> --query id -o tsv (the app ID is in the Script tab command).
Set scope to /subscriptions/<id> or /providers/Microsoft.Management/managementGroups/<id>. After terraform apply return to CostGlass and click I've granted access — Verify.
Advanced: bring your own service principal
Choose this if your organisation will not allow third-party applications. You create the application yourself and give CostGlass its credentials. It covers one subscription only.
setup-costglass-sp.sh (or use the one-line command) and run it with the Azure CLI. It needs Owner or User Access Administrator on the subscription. It creates an app registration named CostGlassReadOnly with Reader and Cost Management Reader and prints the credentials. Click Next: Enter Credentials →.Optional: show your Azure credits
Azure applies credits (for example the Azure sign-up credit) when it produces your invoice, at the billing profile, not on the subscription. That is why Azure's own cost screens show the full usage and CostGlass, which reads the same cost data, showed it too, even when your credit covered all of it and your invoice was £0.
The connect wizard shows these steps as soon as you finish connecting, and the Azure card keeps showing them until it works. With one extra read-only permission, CostGlass also reads your credits from Azure's billing records. Then Cost Explorer shows the cost net of credit (use the credits control to see the gross cost instead), and the Azure card on Settings → Cloud Accounts shows how much credit is left and when it expires. Unused credit is lost when it expires, so CostGlass also adds a note in Cost Explorer when a credit is within 30 days of expiring.
| What you will see | What it means |
|---|---|
| "Credits not shown" on the Azure card | The role above has not been added yet (or has not taken effect). Costs are unaffected. |
| Credit applied to a past month | Exact: the amount on that month's invoice. |
| Credit applied to the current month | Azure's own estimate of the credit it will apply to charges so far. It is updated by Azure every few days, so the last day or two of usage can show as cost until it catches up. It is replaced by the exact invoice amount once the invoice is issued. |
After connecting
- The Connected Azure Accounts card shows each connection with a Tenant-wide badge for consent-based ones, subscription count, resources and last sync.
- Cost and inventory fill in on the next 6-hourly sync.
- A connection stuck at pending shows Finish granting access →.
- Use Connect another tenant for a second Entra tenant (counts toward your plan limit).
- Disconnect from the same card or from Cloud Accounts.
Azure Instance Scheduler is the only Azure write access, and it is opt-in.